Showing posts with label Christmas craft. Show all posts

Sunday, November 17, 2013

Thanks for the photos!

I got two very special emails recently. 

Elaine Sweet sent photos of cards she had made from Wyrdbyrd Designs. I love the bead work!


Michelene Gublin used one of the same patterns to fashion an ornament. The bell is charming!


Thank you, Ladies, for your incredible ideas and for sharing the finished products! 

Tuesday, January 1, 2013

Wednesday, December 28, 2011

New Patterns at Ant of Sweden

Designed by Ant of Sweden


Now available exclusively at  Ant of Sweden: Gift Pack 2.

I've packaged 4 of my most popular patterns in one PDF ebook. These are some of my favorites, and I'm thrilled to bring them to you.

Deco, Ilsa, Hannah, and Erin 

Visit  Ant of Sweden today and see all the great new cross stitch and blackwork designs. From samplers to seat covers, Ant of Sweden offers something for everyone. Check it out; I think you'll be inspired!


Wednesday, December 14, 2011

New Free Pattern

I've been having so much fun with colored pencils on blackwork that I came up with a pattern especially for the method:

Star Window is a small, simple pattern that is easy to stitch and fun to color.
You'll find it on the Blackwork Smalls page.


I also pulled a bunch of samples from my stitching box and have transformed them using colored pencils. I have learned a few things along the way:

1) Don't overdo the color. Many pieces can get weighed down and look muddy with too much color.

Just a hint of color makes the facets of Snowflake Mandala pop!

2) Dampen the cloth, then roll it in a towel to remove excess moisture. A slightly damp canvas makes the color more vibrant. Be careful not to get it too wet; the colors can and will bleed if you're not careful.

I didn't like this pattern at all when I first designed it.
The bright colors have given a boring and clinical -looking
pattern a lively new look.

3) Keep the pencils sharp. Or not. It depends.

A dampened, duller pencil is great for filling in larger areas,
but as you can see, a fine point is needed to get the color
into the nooks and crannies.

4) It's okay to blend colors. In fact, it can lead to some exciting effects.

I was unhappy with the blue I had chosen for the small balls;
they were too bright for the green and gray. I colored over them
with the gray and got a fascinating patina. It wasn't so successful
with the purple, but I think that I used too heavy a hand with the
purple to begin with.

5) You may need a second coat.

After the first coat. Look at the first photo again and
you can see how much I missed. 

6) Keep a Tide Stain Stick handy. I got a smudge of color in the wrong spot and the Tide Stain Stick saved the day!

I'm contemplating using some sort of finish in addition to heat-setting the color. Something to protect it from the elements. Any ideas? Let me know.


Saturday, December 3, 2011

Thrift store find

I'm a fool for a good thrift store. I love uncovering a bargain, finding useful items, and scoring big on those occasional designer clothes with $4 price tags.

Last weekend, I did a little thrift-shopping and came across a collection of fabric-painting hoops. I thought they'd be perfect for displaying my stitched designs. I snatched up the entire inventory.


It wasn't until I got home that I thought of actually using them for their intended purpose...

Wanna have some fun? Grab your colored pencils and get to it! This simple blackwork pattern (you can find it on the "Blackwork Smalls" page) came to life when I used colored pencils:


Dry pencil gave me a pretty, almost pastel appearance.

When I dipped the tip of the pencil in water, the colors became much more vibrant:


Once I completed the coloring, I set the colors by placing a paper towel over the design and pressing it with a hot, dry iron for 30 seconds. It seemed to work fairly well with a practice piece, though I would not recommend this method for cloth that will be washed frequently.

It makes a great ornament and it's a quick and easy way to give your blackwork some amazing color.


Friday, December 2, 2011

Using Metallic Floss

Metallic thread is a must for holiday stitching. It's a fun way to make your needlework sparkle.

If you haven't used metallics before, now is a great time to start. Don't be nervous; it takes a little practice and patience, but if you follow my guidelines, you'll find it's a lot easier than you think.

1) Keep the thread length short--about 12 inches.
2) Use a size 24 needle. Smaller needles can cause extensive fraying.
3) Condition the thread with Thread Heaven or beeswax.
4) If using two strands, thread the needle with a single thread folded in half. Make a slipknot at the head of the needle. If using a single thread, keep the tail short.
45 The needle will cut at the thread and cause it to fray. To reduce that effect, as soon as you have the needle through the fabric, let go of the needle and pull the thread through. Not only does it put less tension on the thread, it also keeps the thread from twisting.
6) Try to keep the thread from rubbing too much against the fabric. Friction against the fabric will weaken the thread and start fraying. Pull straight through the hole.
7) Good tension is essential. I recommend a laying tool or trolley needle to help make the threads lie flat so they can reflect the most light. Pulling too tight can cause kinks (especially in DMC Light Effects) and will kill the sparkle, too.

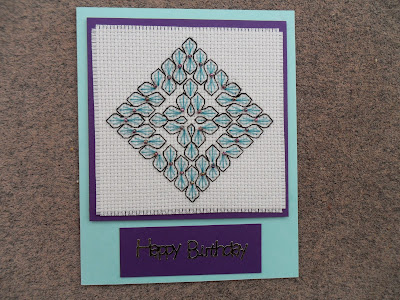
My favorite metallics for blackwork are Kreinik braid and blending filaments. DMC Light Effects is nice for cross stitch. 

Give it a try and see what magic you can create with metallic thread!


Wednesday, November 30, 2011

Quirky Twee from France

One of my favorite things about designing patterns is seeing what people do with them. Earlier this week, I got a message from Michele in France. She had completed her version of the Quirky Quistmas Twee and wanted to share the photos:


I especially like her use of metallic thread on red and green fabric. It really sparkles!
My directions advise that you fill the bottom biscornu with rice, but Michele used decorative gravel; she pointed out that rice could get wet and moldy.

Find out more of her stitching secrets at her blogs: